Dual Care
Project Concept and Background
The project aims to establish bilateral maintenance between human users and non-animate objects, specifically furniture, for the mutual benefit of residents and furniture. The interactions are designed to enhance psychological and mental health for residents by encouraging decluttering, while also supporting the materiality, longevity, and sustainability of the furniture. The project acknowledges that the impact of design extends beyond immediate problem-solving and emphasizes the interconnectedness between humans and things. 'Dual Care' is proposed as a solution to address the continuous care and maintenance challenges in design fields like architecture and interior design, ensuring that psychological and mental health objectives are met through a mutually beneficial relationship with furniture.
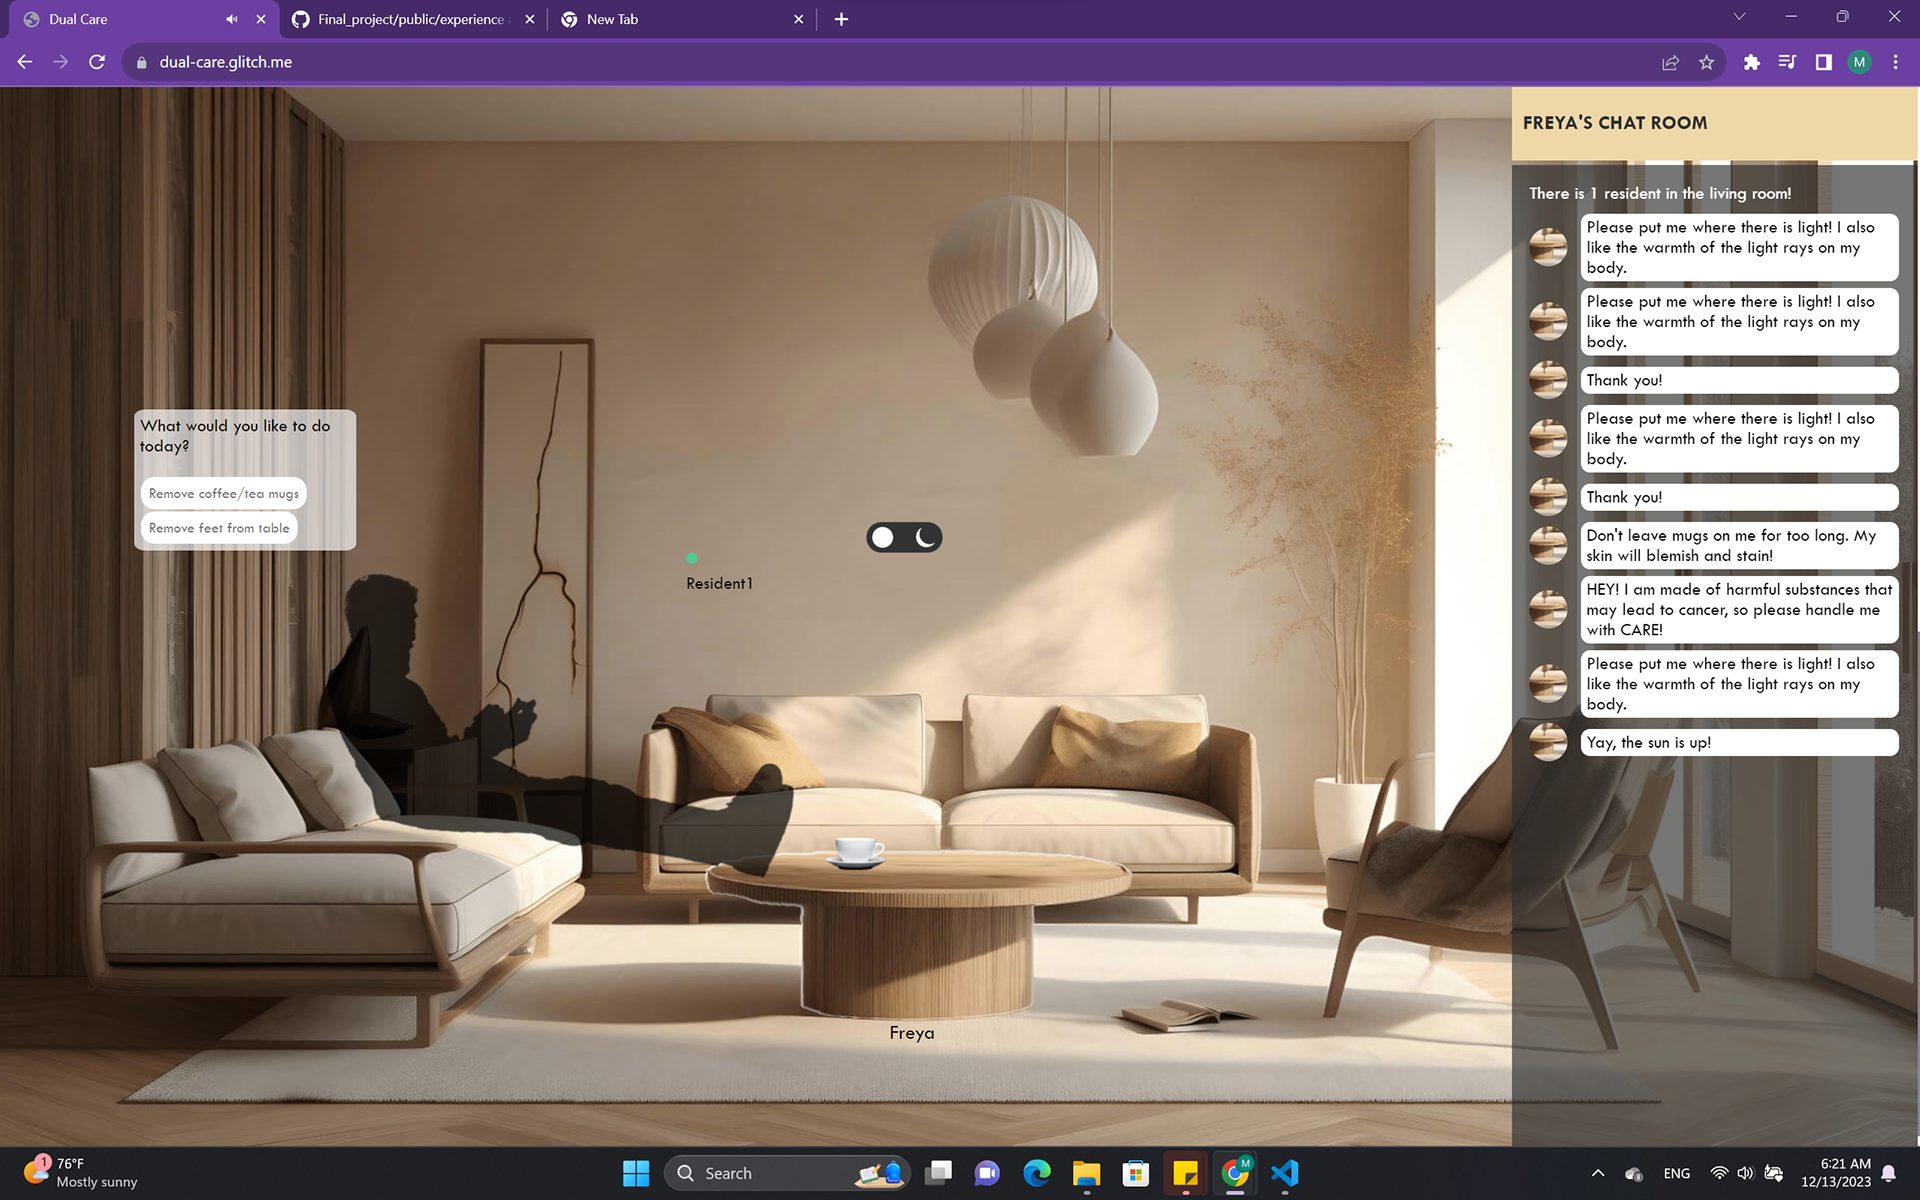
This culminated with an instructions guide on how to interact with and take care of the furniture (done for Critical Experiences class), along with a website where users can test how life would look like with humanized furniture through a few simulated events. Users can interact with other users live - living as residents in a single unit - to test and experience the humanized furniture (theoretically before purchase).
Wireframes and Design Direction
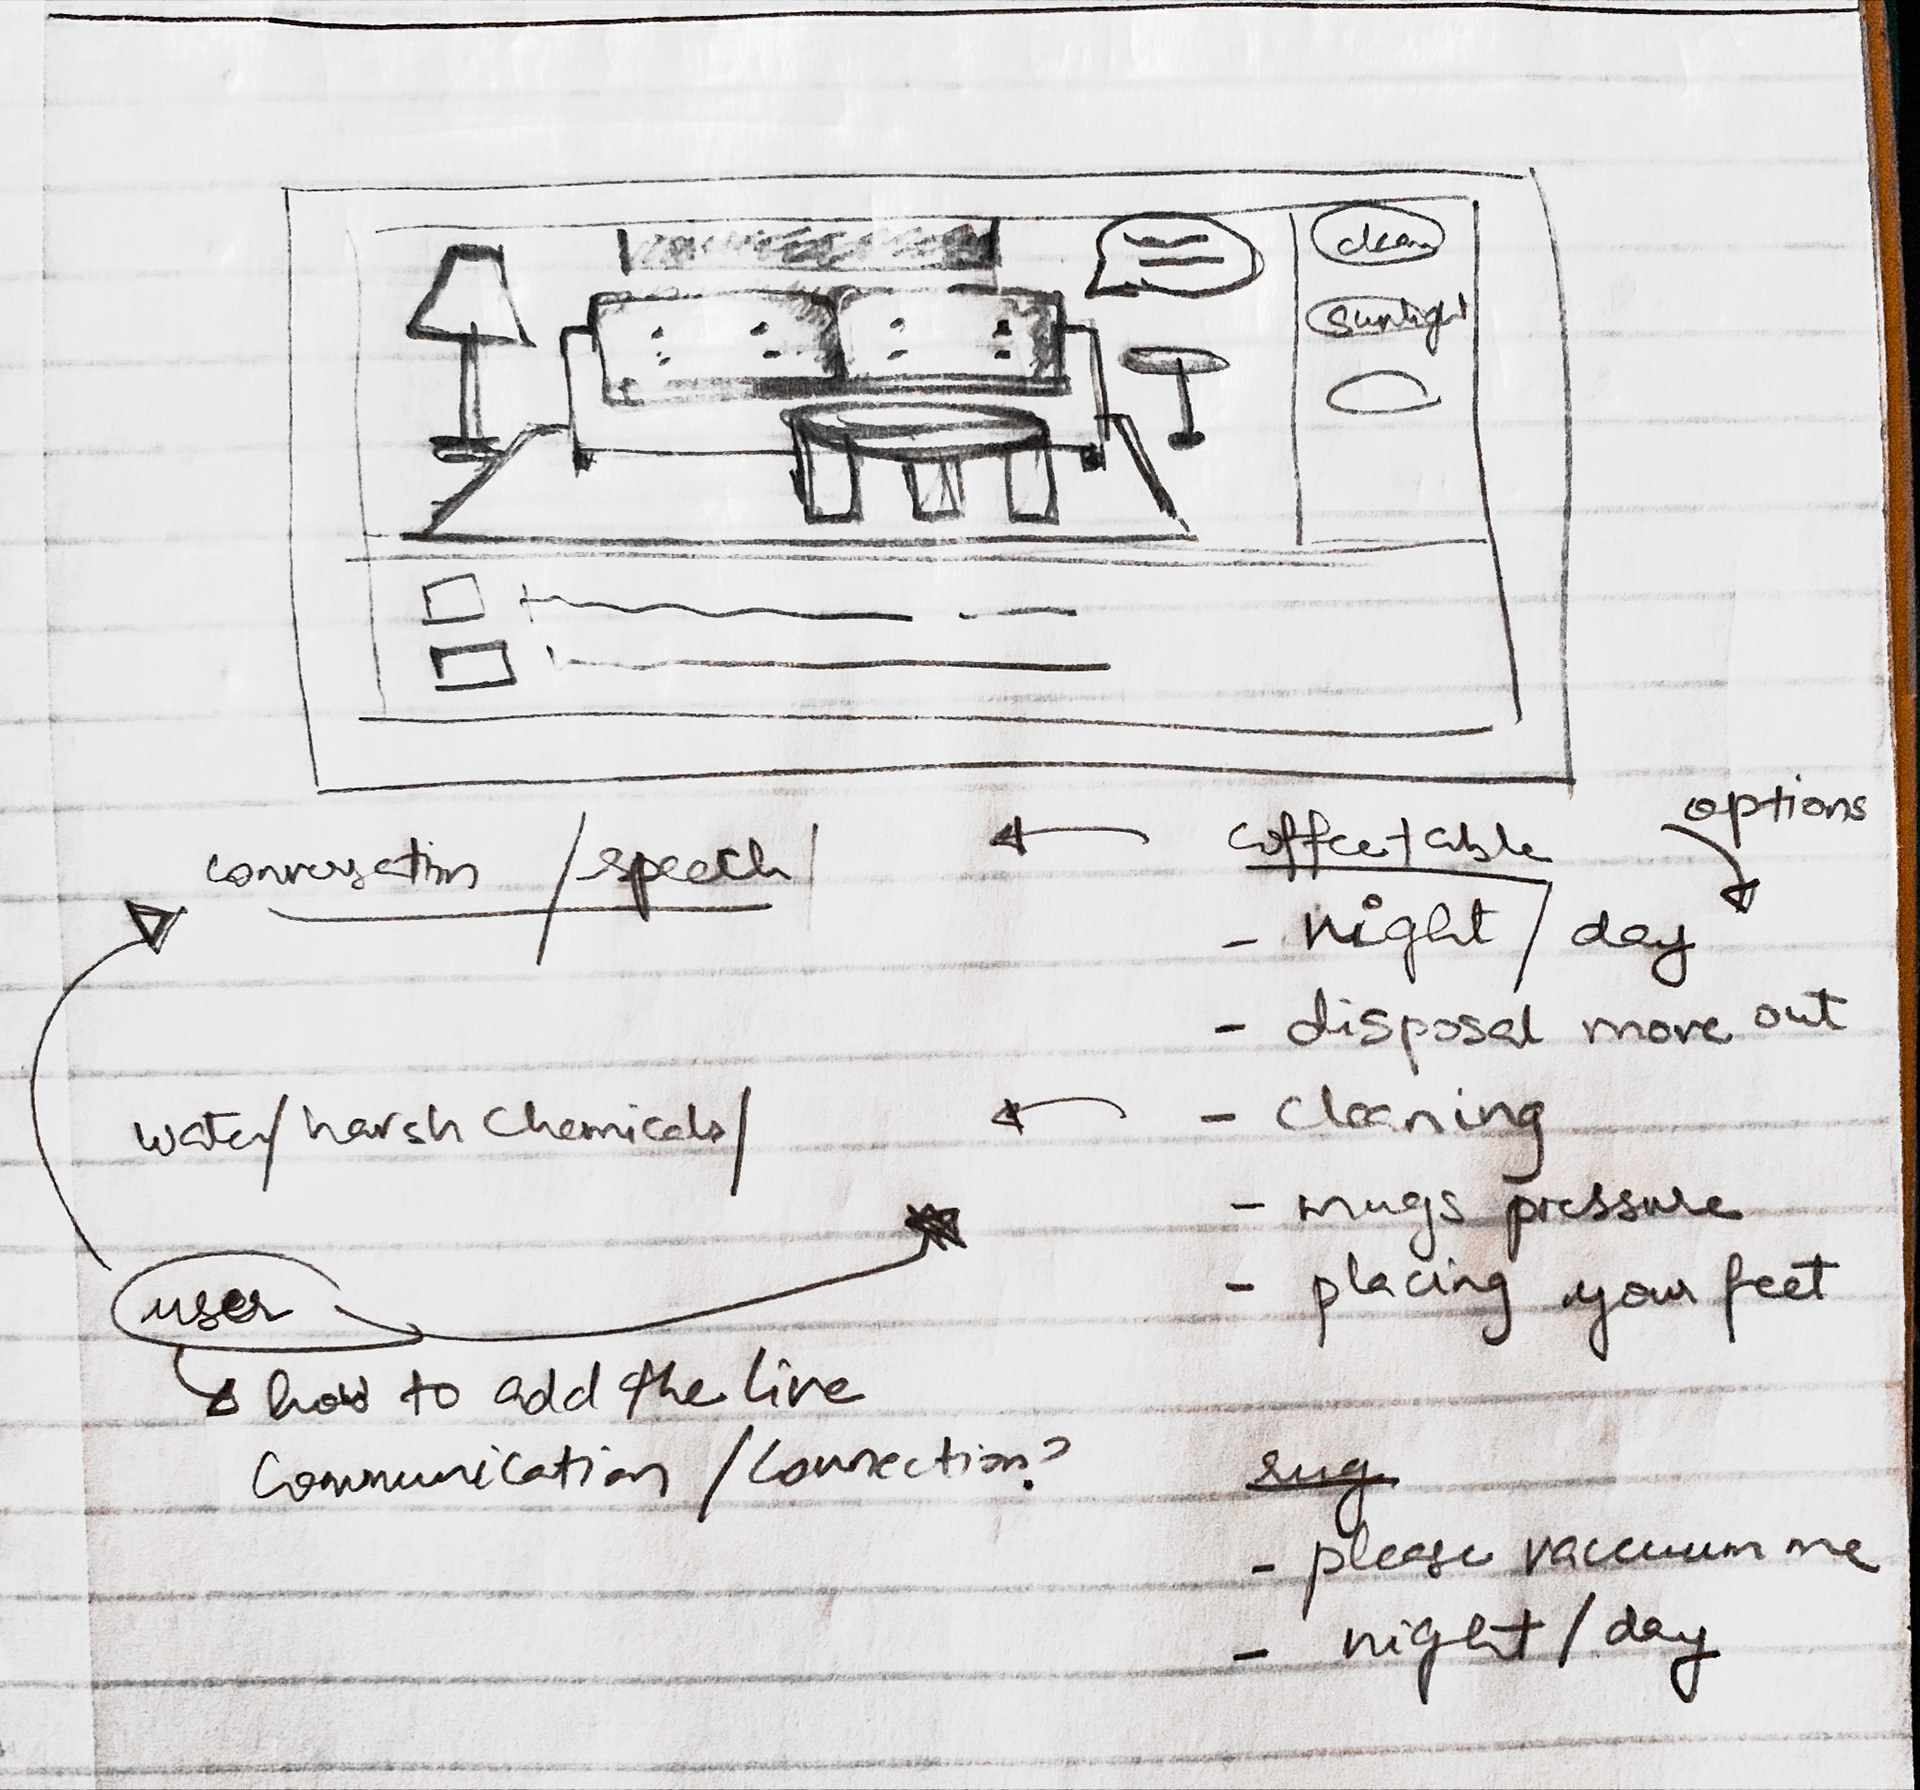
I originally wanted the action buttons (with regards to the furniture) to be a column on the right side of the page, while having the action/speech updates (known as the furniture's chat room) as a row on the bottom of the experience (check left image for reference). I also wanted to have speech bubbles pop up from the furniture. While designing however, I realized it would be better to place the action buttons in various locations that were instinctive to where the action would take place. This would invite the user to explore the scene. I also decided to place the chat as a column on the left instead so the user would have access to older messages. I also opted out of the speech bubbles because I realized I would have to figure out how long they would remain visible and how to remove them when another action would take place, which would generally take longer to code.
In terms of the design, I decided to go for a Nordic/Scandinavian interior scene, which is why the color scheme and style of the website was mostly reflective to the scene's style. The colors used were more on the shades of natural browns and monochrome. The design also adopts a clean minimal direction. For the design of the cursor, I initially wanted to randomly allocate a single color to every client's cursor, but then stumbled upon a lucky accident, where the cursor would change colors every time it was moved. I found this to be very useful across the different shades and colors of the scene, especially when switching from day mode to night mode. It served a huge contrast while moving the cursor no matter what the scene color was behind.
Note: I also planned to have 5 features for the coffee table and a few more rug features, but had to let go of them due to lack of time and my priority to focus on design.
Major challenges and solutions
- Coding using socket.io to account for users who join later
I initially had some difficulty trying to figure out how to update clients who joined later of the changes/actions that would occur in the scene. It was easy to update those who had already joined using io.emit() in every socket.on() for every event, but this would not update the users who would have joined after.
I ended up having to save the actions states in the server (index.js) in objects, update them every time there were changes, and io.to.(socet.id).emit() them every time a client connected under different event names. If I had entered the same event names for the normal back and forth between server and client-side, the code would not function properly. I opted to separate it under socket.on('connect', ...) on the client's app.js. This also helped with limiting the messages that would pop up in the chat for a newly joined client as I could now remove the notifications for them; I did not want them to show up as they seemed a little confusing to a user who would have just joined.

- Getting the mouse positions to show up
The key concept here was to have an object on the server side that would be always updated with the current clients' socket IDs and their mouse positions (which would also be deleted when a client would leave), and have that emitted to every client who connects. These mouse positions were sent from every client's app.js using the 'mousemove' event listener.
Special thanks to Dora for helping me out here
An empty section element created as the cursor container for all client cursors is then defined and set to null every time the emitting 'residentsLive' event is received on the client-side. The object from the data has its values (mouse positions - x & y) extracted and placed in an array. A for() loop is then called to create a div for every element of the array (every client's mouse). This div's location is then updated according to the x & y positions, and also given an anonymous resident number based on the order of connection. The div is also allocated a random different background color every time the x & y positions change, creating the color flickering cursor effect. The div is then appended to the main cursor container.
Special thanks to Dora for helping me out with extracting the object values into an array.
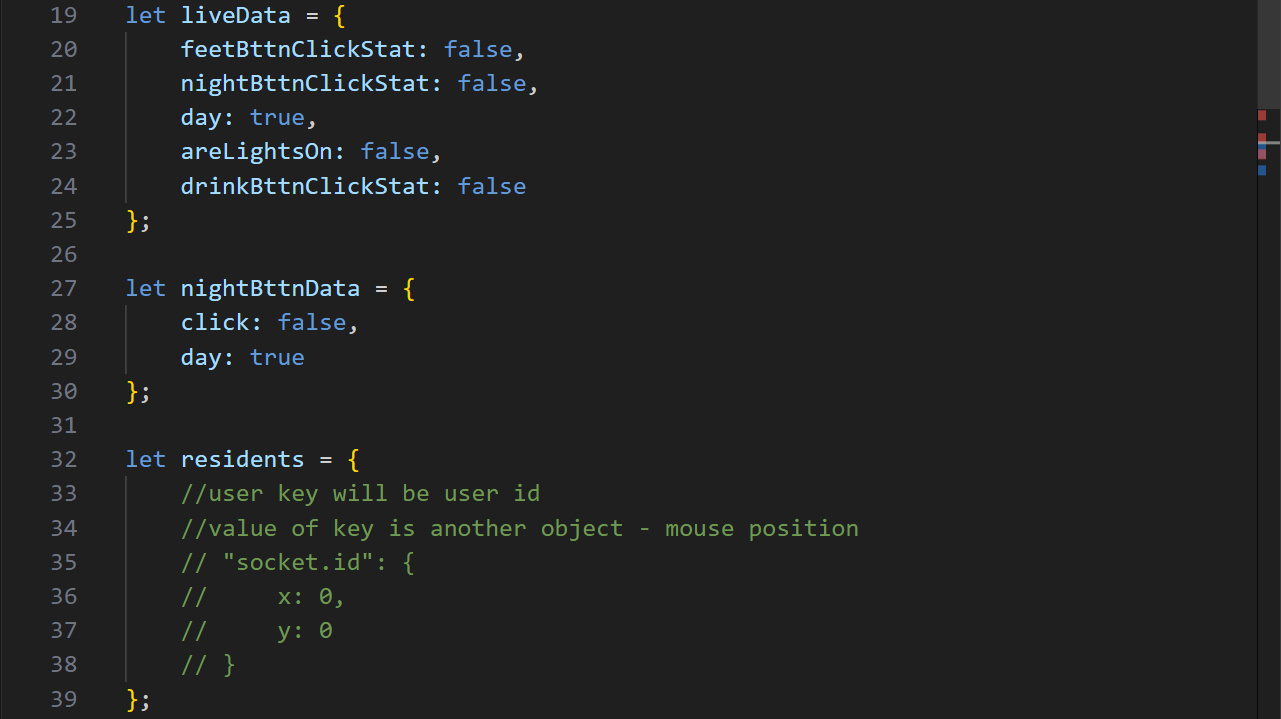
- Functionality of the boolean switches
Because there were so many switches involved whenever a button was pressed, or whenever a newly joined client had to be updated with the action states, the switches became a trial and error process at some point. However, using the console on the developer tools to test what boolean state the switches were in at that particular instant was very useful to figure out the chronological order of how it was updated and pinpoint where the error could be. Still, there might be some once in a blue moon errors with the switches' state that I am not able to figure out why it happens. I might need to recode this part or simplify it another way.
- Creating/editing the visuals using Photoshop
Finding the right scene, editing it and creating the visuals for the scene changes took quite some time, but helped set the experience I was targeting.
Lessons learned and potential next steps
- I definitely learnt more about socket.io, how it functions, and how I can utilize it to do what I want. This realization comes even after I have previously used it in Project 2.
- I should have opted to group a lot of the repeating code when it comes to the messages that show up in the chat room in a function that I could just call back. Not doing that made the code slightly more difficult to read.
- Once I uploaded it to glitch, there seemed to be a slight lag. After testing this with several people, I am assuming it could be based on how good an internet connection is or due to the mousemove event. Will need to debug this further.
- Obviously add more simulated action events (including timed ones), and expanding this to more furniture pieces.
- Adding audio control buttons
- Positioning and sizing the cursor container to be the exact width and height of the scene
- Perhaps adding an extra notification of when a certain client clicks something (like Resident1 clicked this, or Resident2 clicked that...)
- Limiting the number of clients to perhaps 2 or 3 at a time, as the interaction can tend to be too chaotic. Other clients could be made to wait in a waiting room.
- Adding an extra webpage explaining the project concept and background